Xponent's Customer Journey Mapper allows the user to create a visual representations of the customer experience and map journey steps and activities to the underlying graphs that execute and support the customer journey. It is important to create a journey map as it will allow you to visualize and share with all necessary stakeholders how a customer journey should flow, either based off of business objectives or current customer behavior. The Journey Map allows the use of pre-defined Journey Steps and other activities, ensuring that key business points of interest are reflected in both the Journey Map and graph. Each Journey Map can also be saved as a template to be re-used within any project in the organization, allowing you to save time and gain efficiency.
Creating a Journey Map
To create a customer journey for your project click on the create Create Journey Map button 
 on the Journeys tab of the project page.

This brings you to the Add new Journey dialog for this project. In order to create a new journey you need to project a Name, a Description and then press the Create journey button at the bottom of the screen.


The Journey Mapper
Once the customer journey Customer Journey has been created you will see the Journey Mapper interface that allows the creation and annotation of customer journeys in a free-form manner. You will also see two journey steps automatically included with the names "<your journey name> Start" and "<your journey name> Completion". These journey steps are by default considered as "Neutral" outcomes and cannot be removed from the journey map. The journey steps are added to help users understand where the start of a journey and the end of a journey would be considered. You will also be able to add these two journey steps in a graph as well to allow you to start tracking the success (start and stop) of your journey. The Journey Mapper also allows metrics to be created and associated with journey elements and journey nodes and for journey elements to nodes to be associated with graphs.


The Journey Mapper has the following panels:
- The canvas shown on the left hand side of the window
- The right hand column in Design or Execution Steps & Metrics and Style mode controlled by the toggle switch at the top right of the window
- In Design Mode Steps & Metrics the right hand panels are from top to bottom:
- The Journey Name and Description panel
- The Step panel
- list of Journey Steps
- Metrics (if created)
- Environments - toggling by environment will filter out the metrics and steps in the selected environment
- In Style mode the right hand panels are from top to bottom:
- Add node
- Various styles that can be used for a node or step


The Journey
...
Each panel can be expanded to fill the full right hand column by clicking on the expand icon  in the top right of each panel. The panel can be collapsed by clicking on the collapse icon
  .
.


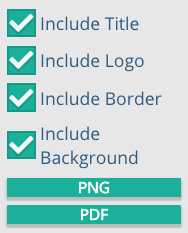
Mapper also enables you to generate images or 'screenshots' of your journey as either a .PNG or a .PDF. Just click on the Generate Image link and you will be presented with the following options:

When you're ready to generate the image, just click on the appropriate button and an image will be generated for you. You should be able to find this image in the Downloads section of your OS or web browser.
Drawing and Annotating Journeys
New journey steps can Journey Nodes can be added to the map by dragging out a new icon from any step on any node on the map on the grab arrow that appears on the stepnode.


or by right clicking on the Journey Map canvas and selecting 'Add Step to JourneyNode'  . Steps
  Nodes are deleted from the map by right clicking on the step and node and selecting 'Delete StepNode'.


The icon itself, the background color, and foreground color can be changed for any icon either by clicking on the icon and then using the Customize Journey Step panel on the right hand side of the window or right clicking on an icon on the canvas and choosing 'Apply New Style to StepNode'


The Customize Journey Step Node panel allows control over the foreground and background colors as well as the icon type itself:


The Customer Journey can be created using any combination of icons and foreground and background colors:


Each Journey Step Node has a Step Name and a Description which are edited by clicking on the step node and changing the values in the right hand Edit Step Node panel. The Save Changes to Step button should be clicked before deselecting the journey stepnode.


The Journey Map has two modes for showing just the journey steps or the steps nodes with the names of the steps in the bottom of each step. The Hide/Show Step Names 
![]() button to the top right of the canvas is used to toggle between the two views.
button to the top right of the canvas is used to toggle between the two views.


The links between steps can also be annotated by clicking on the link and using the right hand panel to change the link name and description. Separately the link background color and text color can be changed to fit any desired color scheme. Once a color has been chosen from the color picker the hexadecimal code for that color can be copied and pasted to other links.


Adding Journey Steps to a Journey Map
You can also associate your pre-defined journey steps in the journey map.

 Simply right click in the map itself to add the journey step or you can also add a journey step by double clicking on the Journey Step icon in the right hand panel.
.jpg?version=1&modificationDate=1675862846798&cacheVersion=1&api=v2&height=400)
Once you have added your journey step into the journey map, you can then customize it with any of the pre-defined icons provided by Xponent or add in your own from the right hand panel.
Journey steps, when created, are stand-alone steps and should be added to relevant graphs and journey maps in order the steps to be recorded.
Converting an Existing Journey Node to a Journey Step
To convert an existing journey node within your journey map to a Journey Step, simply select the journey node you want to convert and right click.

Click on the Convert to Journey Step and the existing journey node will then pull up a dialogue box where you can confirm the name of the journey step, outcome, outcome label and description.

Once confirmed, click on the Convert Journey Step button and the existing journey node will be converted into a journey step.

This new journey step will also automatically show up in your journey step list.

Journey Mapper Main Features and Functions
While there are many more features in the Journey Mapper to explore, this section serves to highlight some of the main features one should consider using.

Letter | Name | Function |
|---|---|---|
| A | Generate Image | Generates an image of the entire Journey Map with the title, the Xponent logo, a border, and the background in the form of a PNG or PDF.
|
| B | Hide sidebar | Hides the most right bar so Journey Mapper view will show just the metrics and the steps |
| C | Show step names | Shows the names of each of the steps used in the Journey Mapper view |
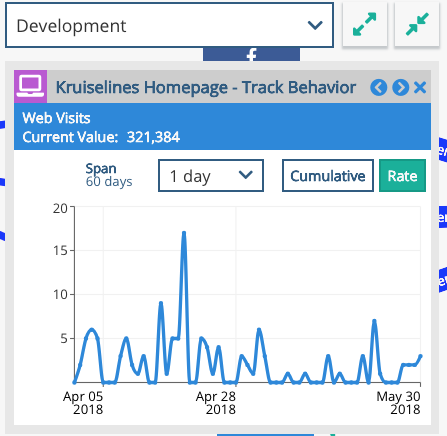
| D | Show pinned metrics | Displays the graphs of all metrics that have been associated with the steps in the Journey Mapper. The standard metric display will look like the below, where you have the option to select which environment's metrics you want in the dropdown, the option to minimize and maximize the metric graphs, and the time interval axis of the graph
|
| E | Delete Journey | Permanently deletes the journey, it will bring up a prompt asking 'Are you sure you want to permanently delete 'JourneyName'?' before it deletes it. |
Anchor Deleting a Journey Map Deleting a Journey Map
517309367
| Deleting a Journey Map | |
| Deleting a Journey Map |
You can delete a journey map just by selecting the journey map and clicking on the trash icon.

Deleting a journey map will just simply remove the journey map from your project and cannot be restored. However, if you decide to create a new journey map under the same name at a later date, the system will just automatically restore the previously deleted start/end journey steps and its associated metric count from the earlier deleted journey map. This is because journey steps are considered as a soft delete by the system. So it is recommended to try and use a new name for the new journey map to avoid confusion in the outcome metric count.

If your journey map includes journey steps that have been associated with graphs and you decide to delete the said journey map, the associated Journey Start and Journey End steps used in graphs could then cause errors in execution. So, before deleting, please ensure that the associated Journey Start & Journey End steps are not used in any graphs or those steps can be replaced with either another node or another journey step.
Journey Map Collaboration
The Journey Map and the Graph Editor are collaborative tools. Only one person at a time can be editing the journey map but multiple people can be viewing the journey map. If the journey map is being edited by another user then the screen will be "gray" and a "Currently Being Edited By" message will be shown at the bottom right of the screen. You can watch other people modify the journey whilst it is in a locked state.


To take the lock press the Release Lock button. This will allow you to edit the journey. If two people release the lock at the same time the next person to actually edit the journey will be the person who captures the lock.